Not rated yet
Creators and Publishers
MinecraftStorage
PublisherAdditional Links
You may find some useful information by following these links
https://www.curseforge.com/minecraft/mc-mods/reign-of-nether-rts-in-minecraft
Share this post
Reign of Nether RTS Mod
Transforms Minecraft into a Real-Time Strategy game where available resources are to be utilized strategically to ensure the survival of your faction.
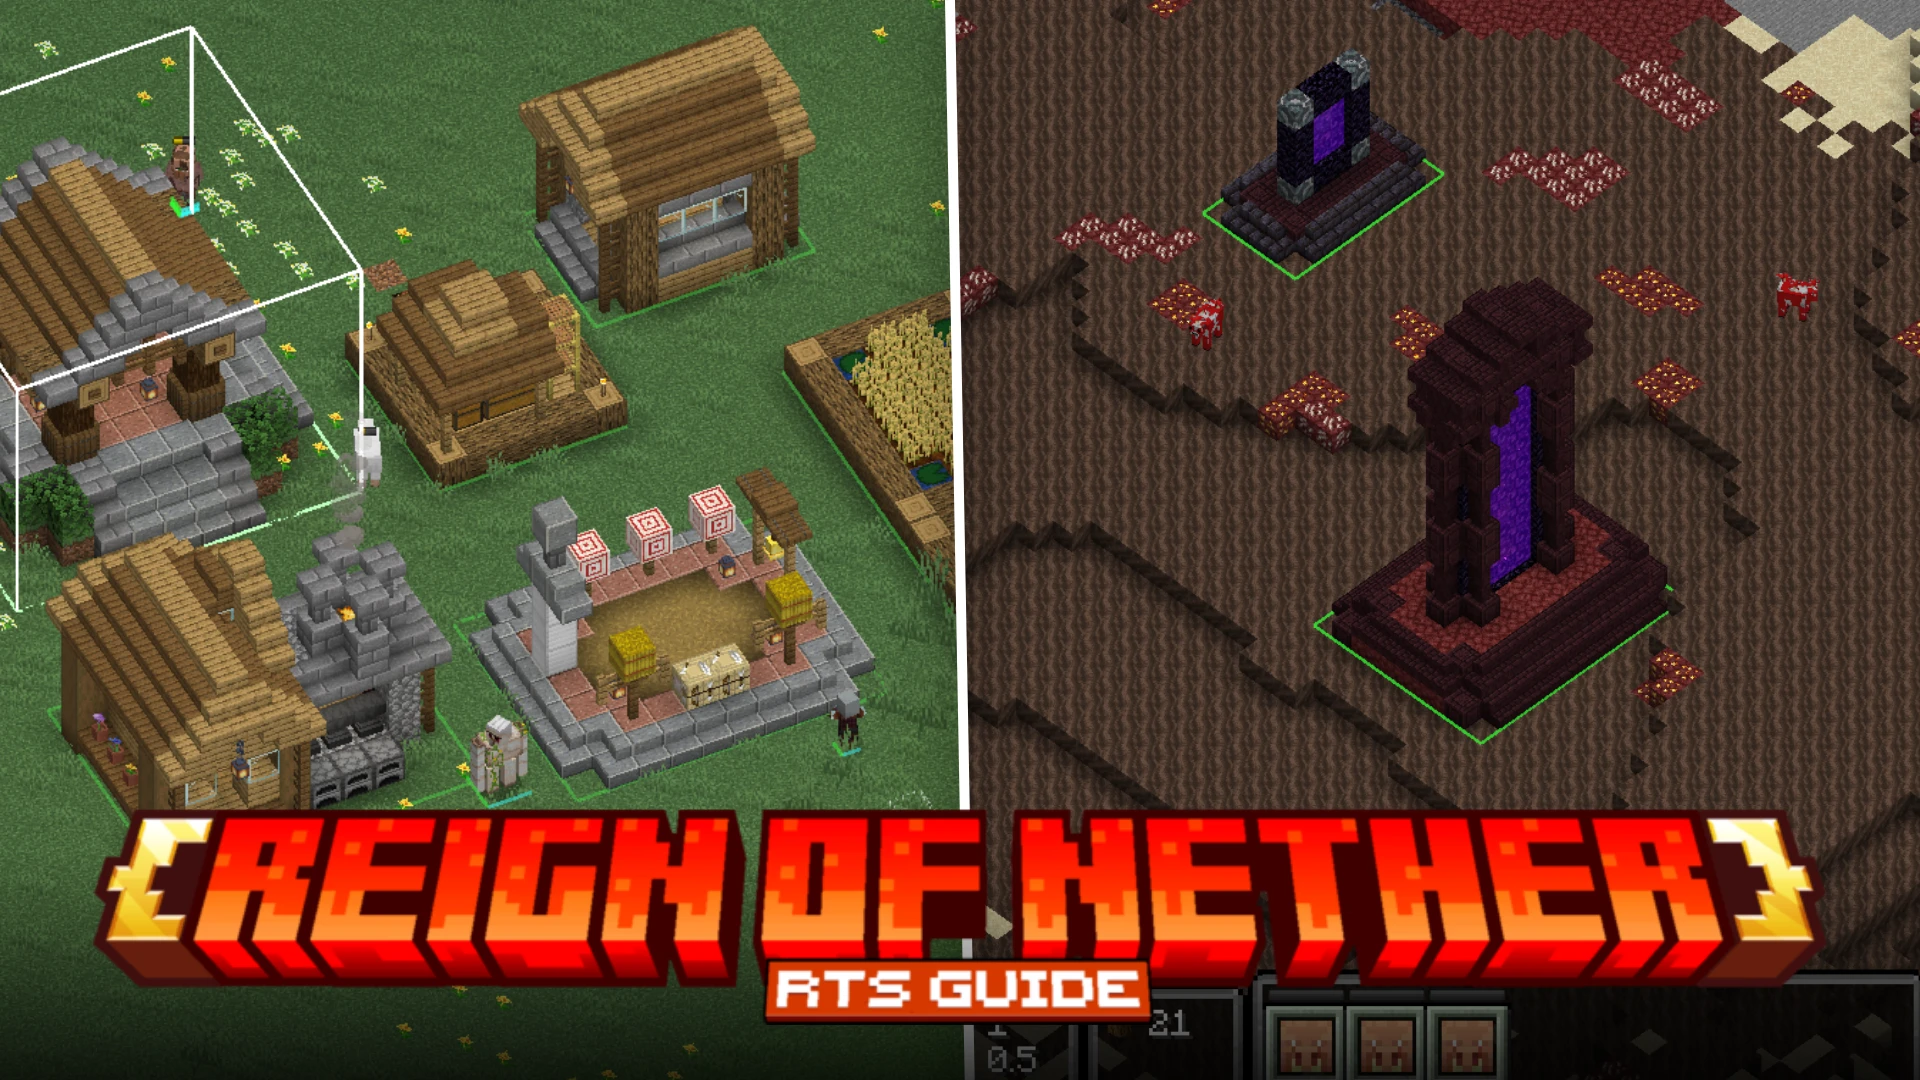

Due to the lack of beginner friendly guides, starting up with the Reign of Nether RTS mod might seem complicated for beginners. The goal of this simple guide is to assist beginners with starting with the mod. We begin by learning some basic mechanics, and then we advance into game progression.
Basic Controls
Let us first take a look at some of the basic controls of this mod. These controls are key to performing any action in the game.
How to change perspective?
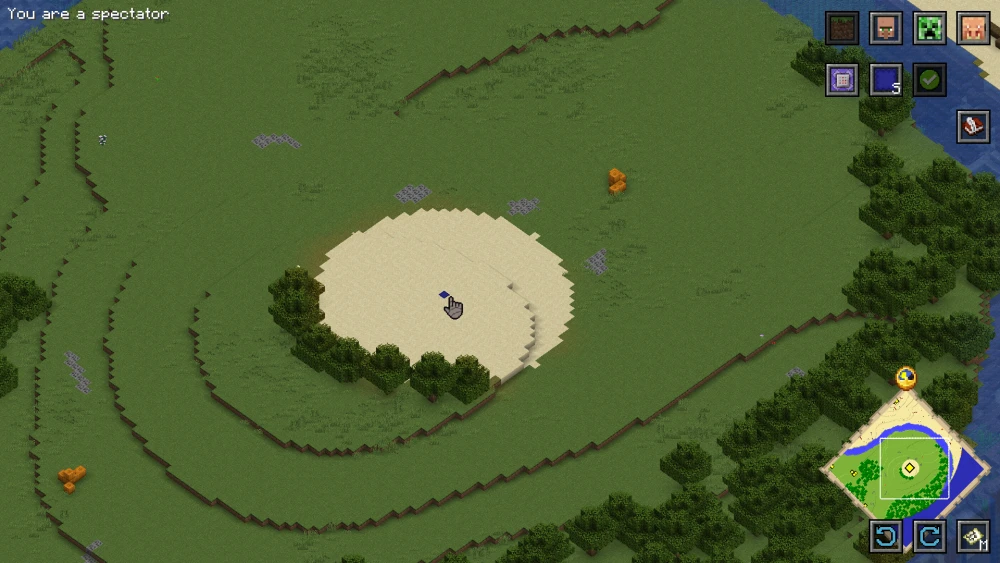
When you first enter the game with this mod installed, you will enter the game in first person perspective camera as usual. Simply press the F12 key to enter the RTS camera.
How to navigate through the map?
Once you are in the RTS camera, you will have to navigate through your world to build/operate in different areas. To navigate through the map, press and hold down the ALT key, and then left-click and drag on the screen.

How to zoom in/out?
To zoom in and zoom out of the map, hold down the alt key and then scroll the mouse wheel. Scroll up to zoom in and scroll down to zoom out.
How to select objects and entities?
To select an entity, you simply have to left-click on them. Click and drag over multiple entities to select them all. You can also select builds and objects by left-clicking on it.
How to Rotate RTS Camera?
Let us now take a look at how you can rotate the RTS camera. You simply have to hold down the alt key and then right-click and drag horizontally on the screen. This allows you to view your world from different angles.

Gameplay Guide
We have now learnt about the different navigation and selection controls. Let us now begin the actual gameplay guide of the Reign of Nether RTS mod.
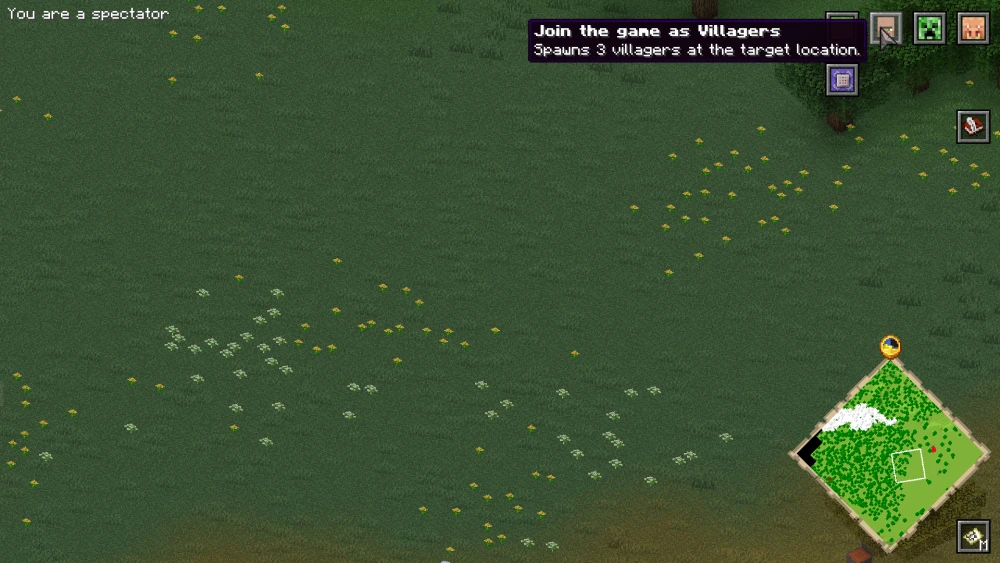
Choosing a Game Mode
You can choose from a total of four different game modes. The game mode you choose should be based purely on your personal preference. Let us take a look at all four game modes in detail, so that you can make an informed choice.
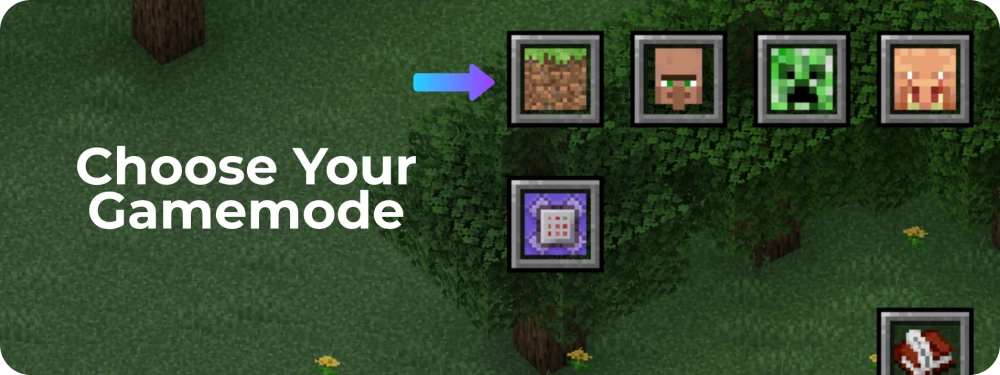
Clicking on the grass block icon shown in the image will allow you to switch your game mode. This button will be located at the top-right corner of your screen.
Classic: This is the original RTS game mode. This is made for a multi-player game, where the goal is to attack opponent factions, while defending your own.
Wave Survival: In this game mode, waves of monsters will attack your faction. The goal is to survive these attacks.
King of the Beacon: This is a multi-player game mode, where the goal of each faction is to attain control over a central beacon.
Sandbox: This game mode allows you to freely build a faction. Like creative mode.
Choosing a Faction
The mod allows you to choose from three different factions. While the core gameplay elements remain the same, the faction you choose will completely change how you play.
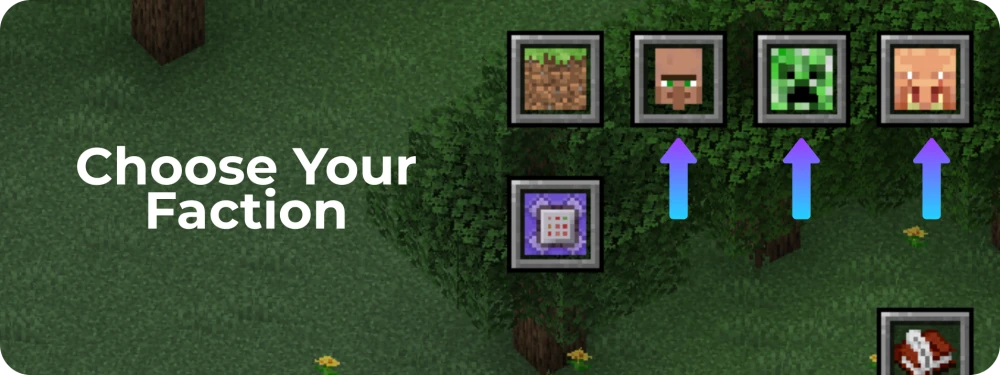
Three buttons are given beside the game mode selection button. Once you have selected the game mode, you can click on any one of these three buttons to officially begin your game. Let us take a look at the three factions in detail.
Villager Faction
The Villager Faction will allow you to begin with three villagers. Villagers will be your core workers, and every build in your faction will be village themed, with wooden building blocks.
Monster Faction
The Monster Faction will allow you to begin the game with three monsters. The monsters are tamed and under your control. Monsters can only venture out at night to perform activities, as sunlight harms them.

Piglin Faction
The Piglin Faction will allow you to begin with three piglins. These piglins will work for you and build your faction. Placing a build from the piglin faction will convert any overworld block in the surrounding area into Nether themed blocks.
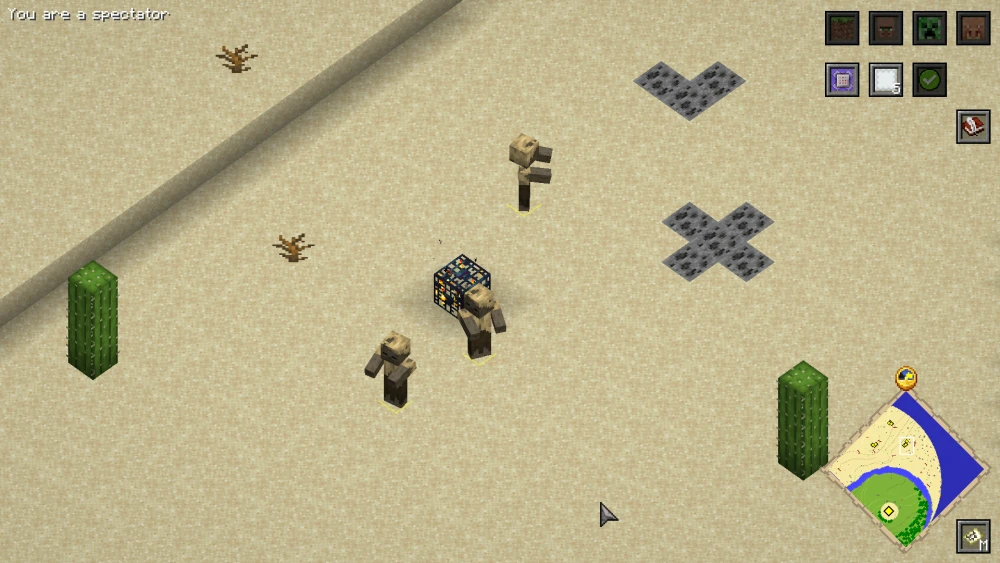
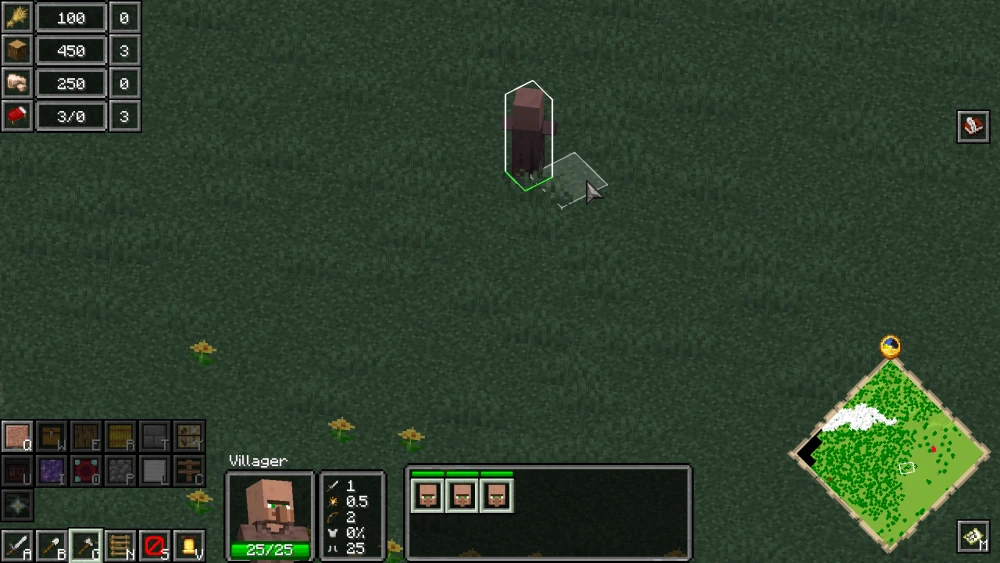
Deploying your Citizens
Based on the faction you choose, you will be allowed to deploy three mobs. For this guide, we will be playing as a villager faction, where we begin with three villagers. The mechanics are similar independent of the faction you choose.
To deploy your villagers, you simply have to click somewhere in your world. Three villagers will now be placed into your world.
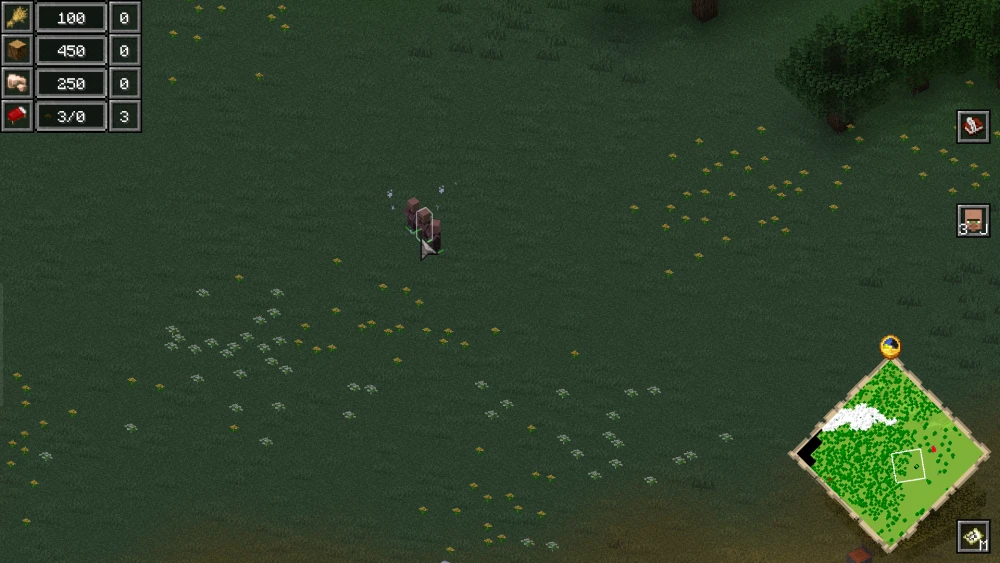
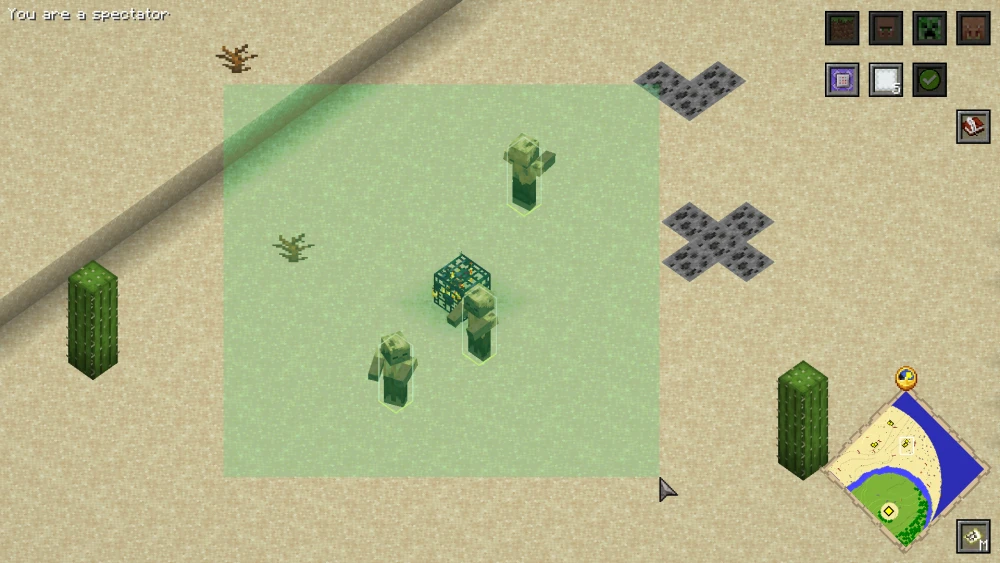
You can click and drag over these villagers to select them all.
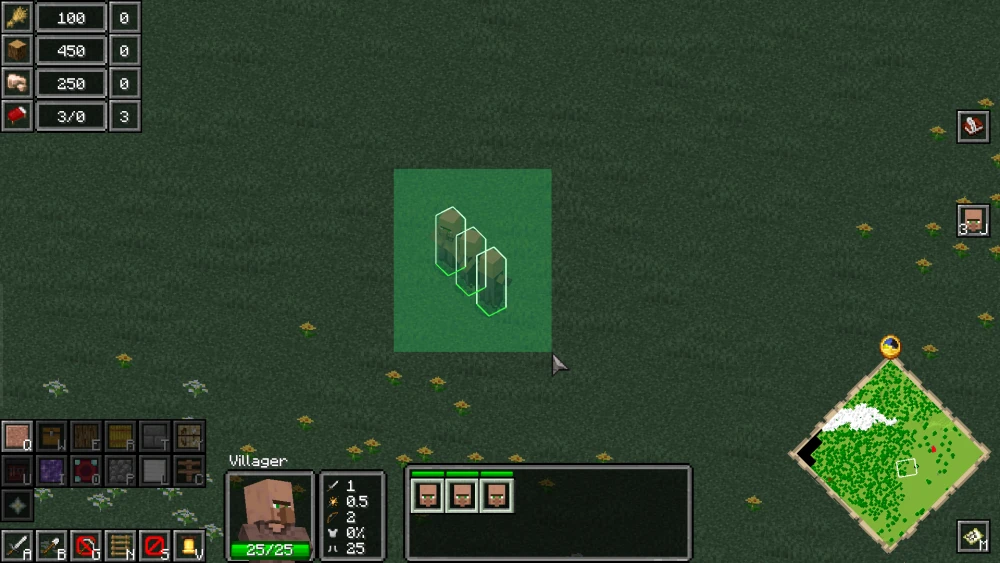
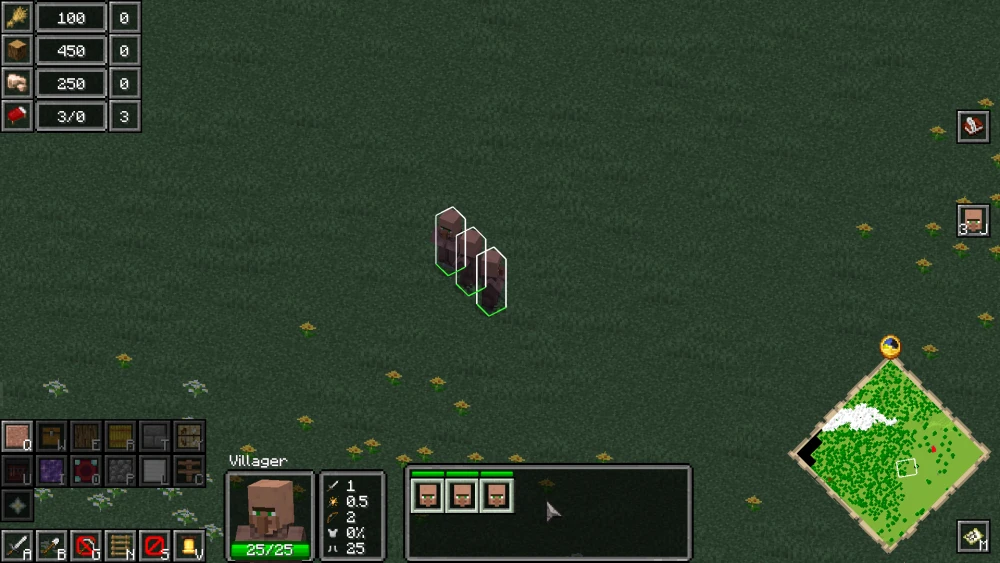
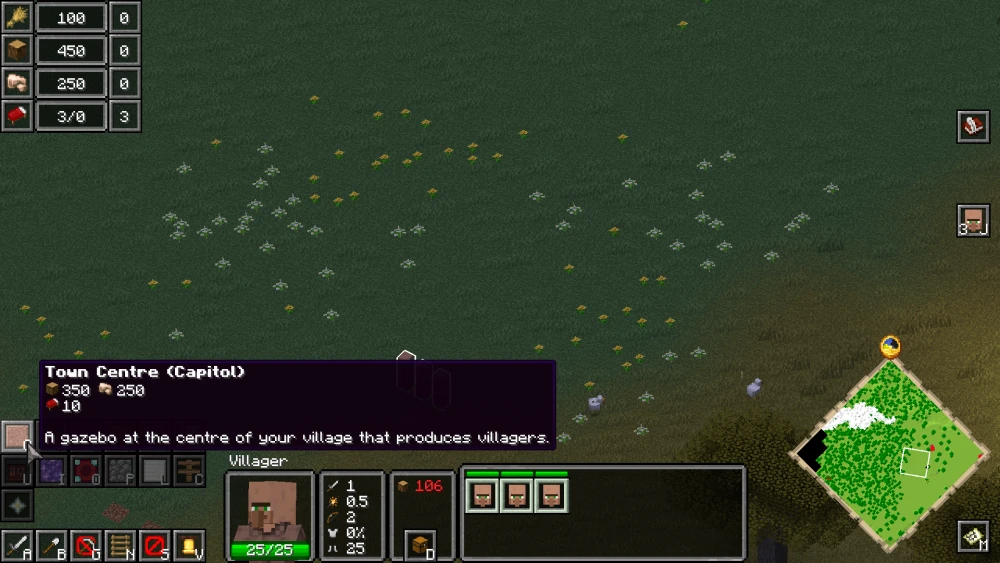
Resources
Let us now take a look at the Resource Count Indicator provided at the top-left corner of the screen. This indicator is crucial as it lists out all the resources you have at hand.
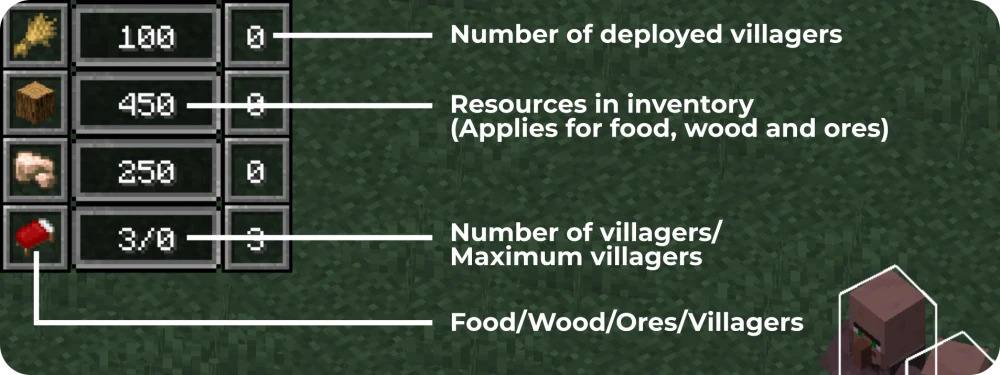
The left-most column shows the resource. The wheat icon is food, oak log icon is wood and raw iron icon is ore. The bed icon allows you to track your villagers. The second column shows the amount of resources you have collected. You will already have some resources when you first begin your game. The third column shows the number of villagers you have deployed to collect the respective resource.
In the case of the bed, the central column shows "3/0". This means you have three villagers in total and zero space available to inhabit villagers. Once you build the townhall structure, the 0 will increase to 10, meaning you will be able to deploy seven more villagers to have a total of 10 villagers. More about this will be explained in the step to construct a townhall.
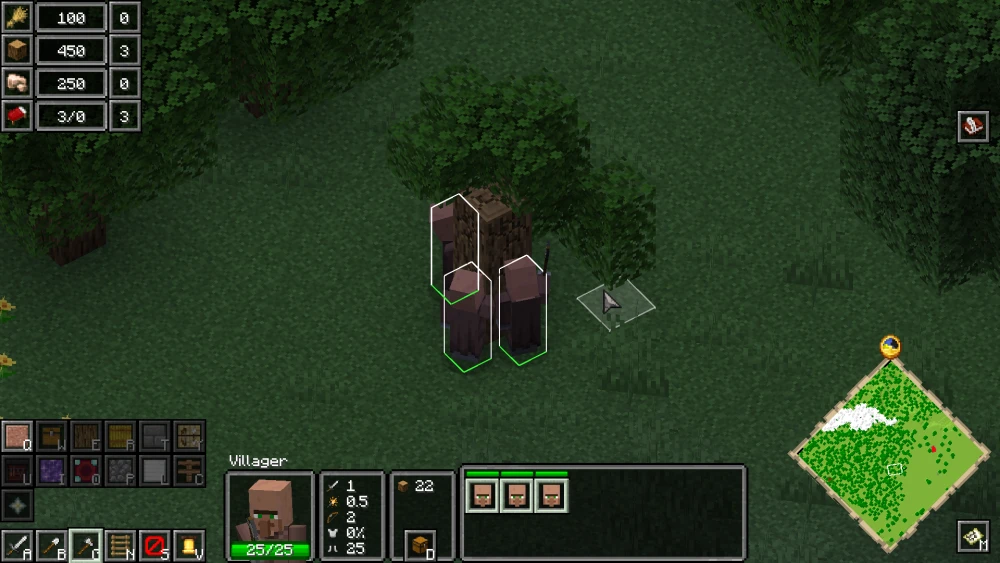
How to Collect Wood?
To collect wood in the Reign of Nether RTS mod, you have to manually deploy villagers.
The first step is to select some villagers, then you can hover over the "Gather Resource" button given on the bottom-left corner of the screen. By default, this button will say "Gather Resources (None)". Clicking on this button will allow you to select a target resource for the selected villagers - food, wood or ores. Simply click on it until it shows "Gather Resources (Wood)".
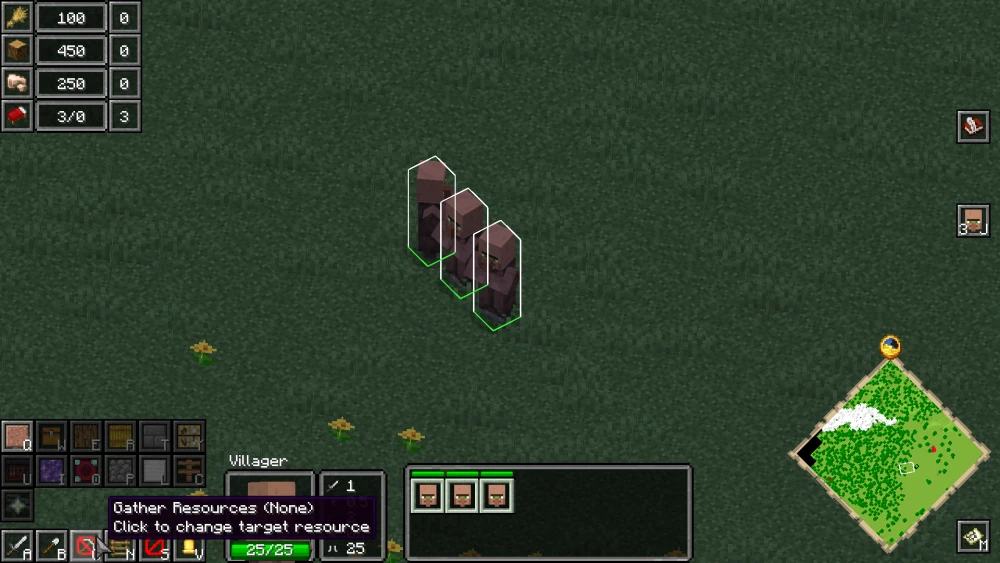
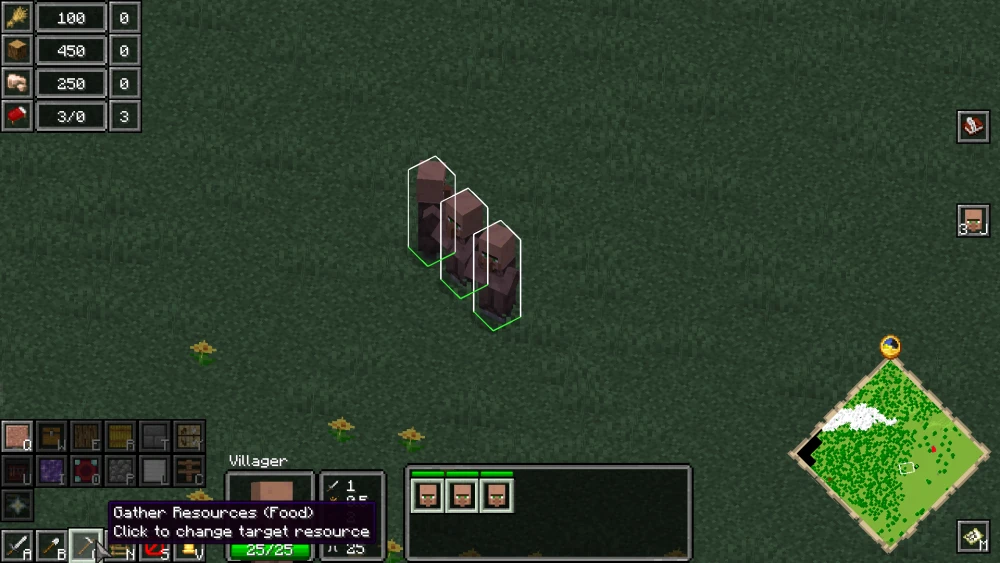
Once the target resource is set to wood, the selected villagers will immediately move towards nearby trees and start chopping them down.
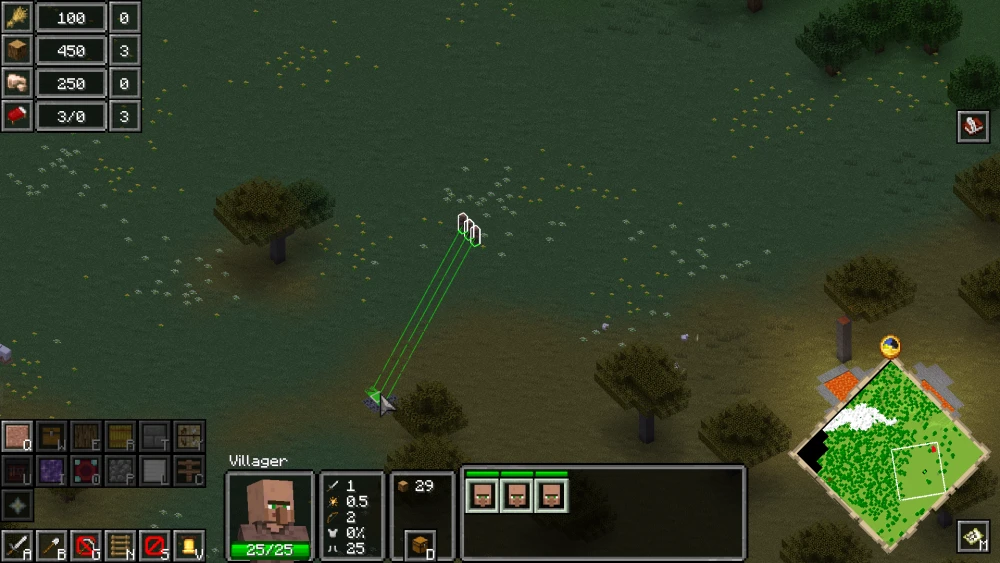
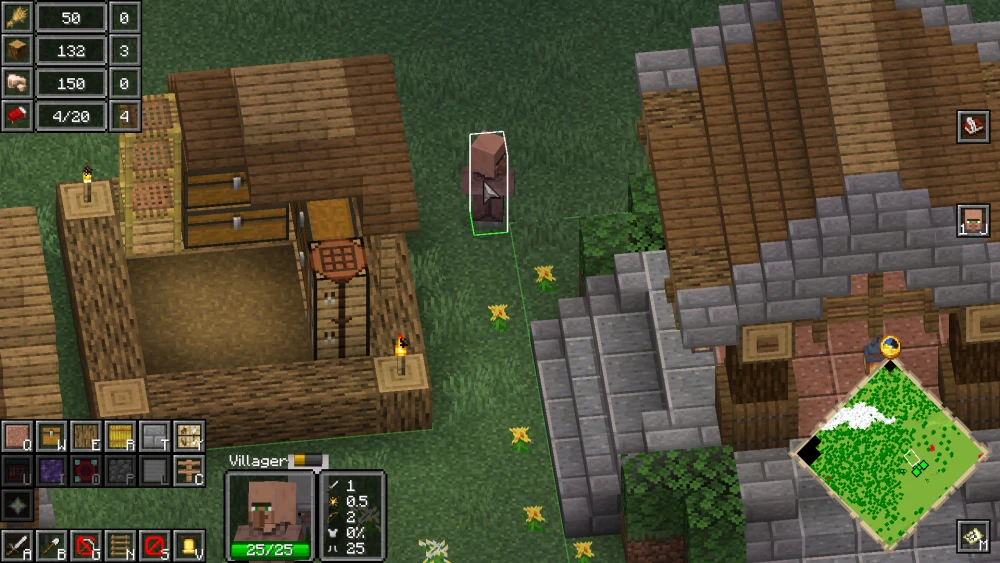
How to Assemble Villagers?
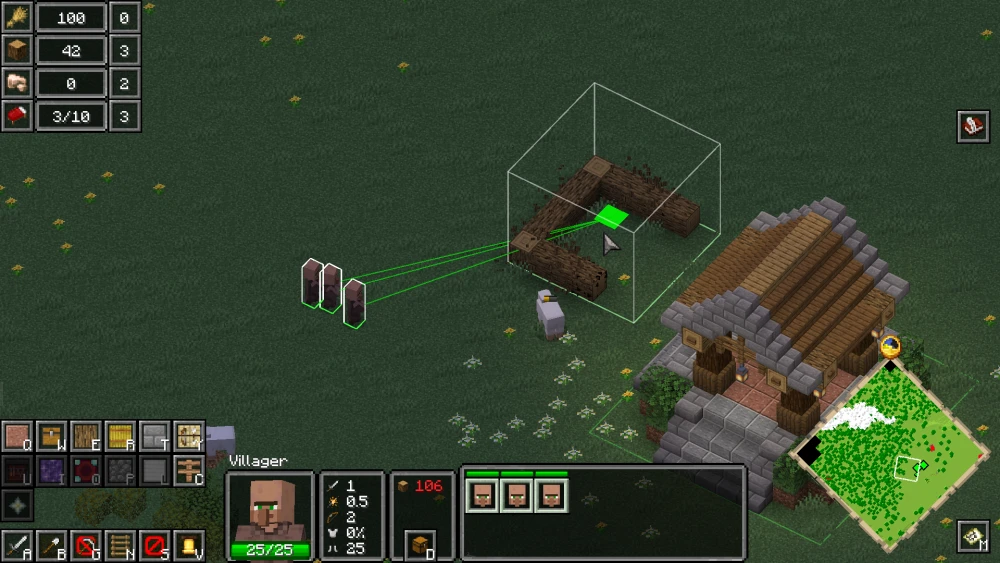
Sometimes, the resources to be collected will be far away from the villagers and they might not be able to pathfind towards the resource by themselves. In this case, you will have guide them closer to the resource.
To assemble villagers to a location of your choice, first you have to select the villagers to be assembled. Then right-click on a block at the area for them to assemble. A green line from each selected villager to the point of assembly will be shown to confirm that they are moving towards the assembly point.
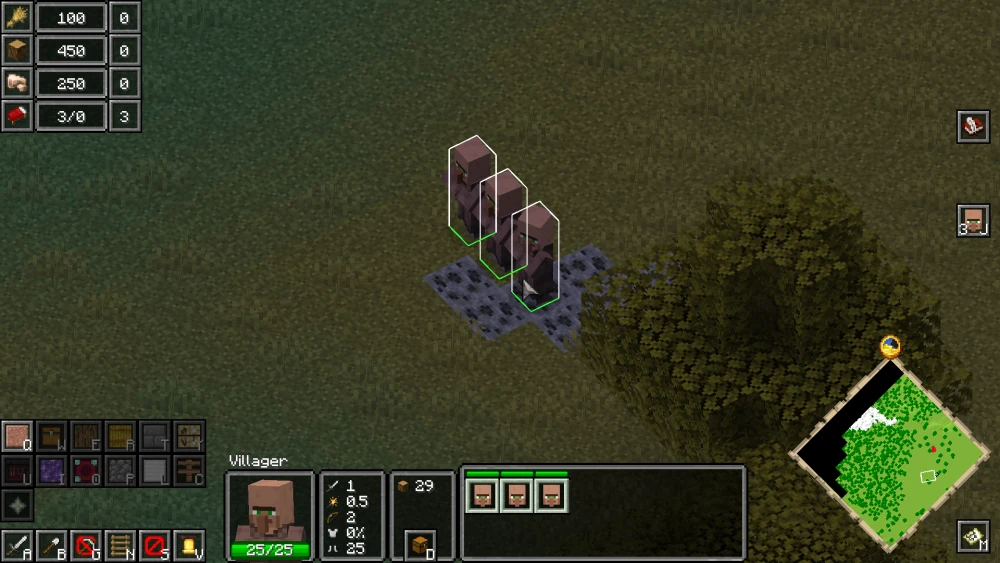
How to Collect Ores?
The method of collecting ores is very similar to that of collecting wood. Simply set the target resource to ores instead of wood. If required, guide the villagers to ores as shown in the previous step. Once the target resource is set, the villagers will start mining the ores.


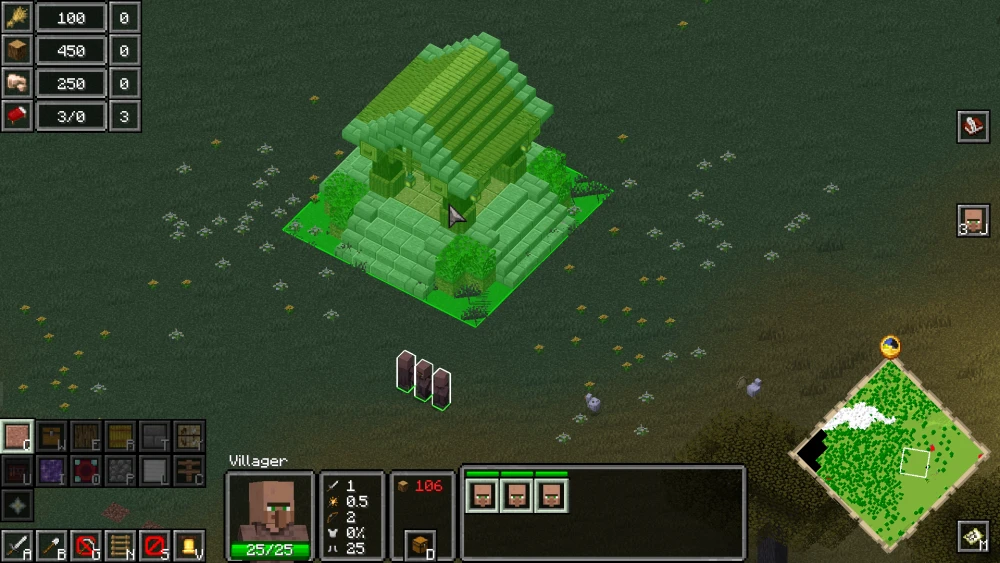
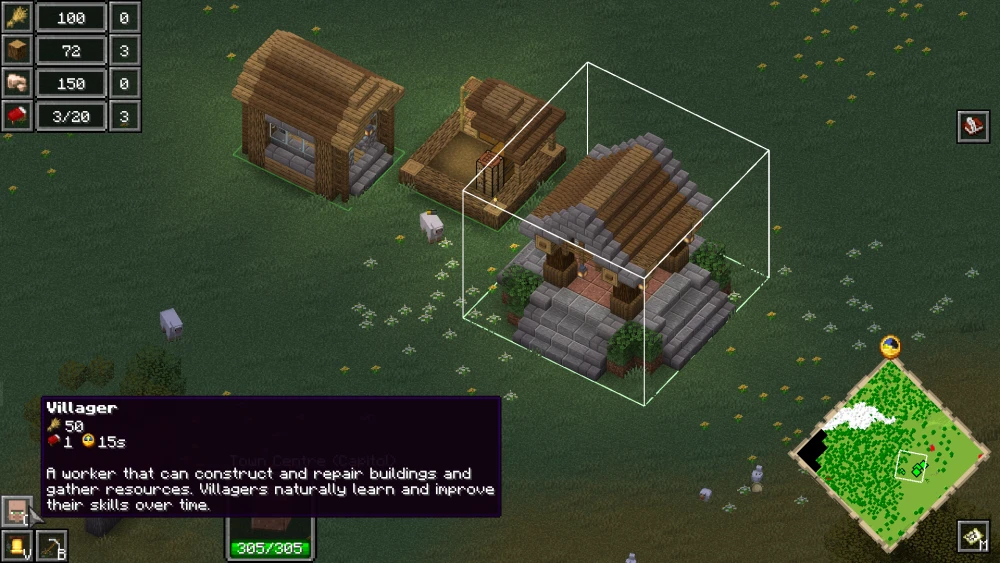
How to Build the Townhall?
Once the resources are all set, you can begin building actual structures. A list of builds available for construction are shown at the bottom-left corner of the screen. Hovering over each will open up a tooltip showing the name of the build, the resources required to build it, and the function of the build.
At the beginning, all structures will be greyed out, except the townhall. This is because the townhall is the most important structure of your faction. This is the first structure you have to build, after which you will be able to unlock more villagers and get access to more builds.
First select some villagers for construction and then click on the townhall icon. This will open up a 3D hologram of the build that will follow around your in-game cursor. Place the townhall at an optimal location, and the selected villagers will begin with the construction of the townhall.
You can also assign more villagers for construction. Simply select the villager and then right click on the hitbox of the build. This will assign the villager for construction.

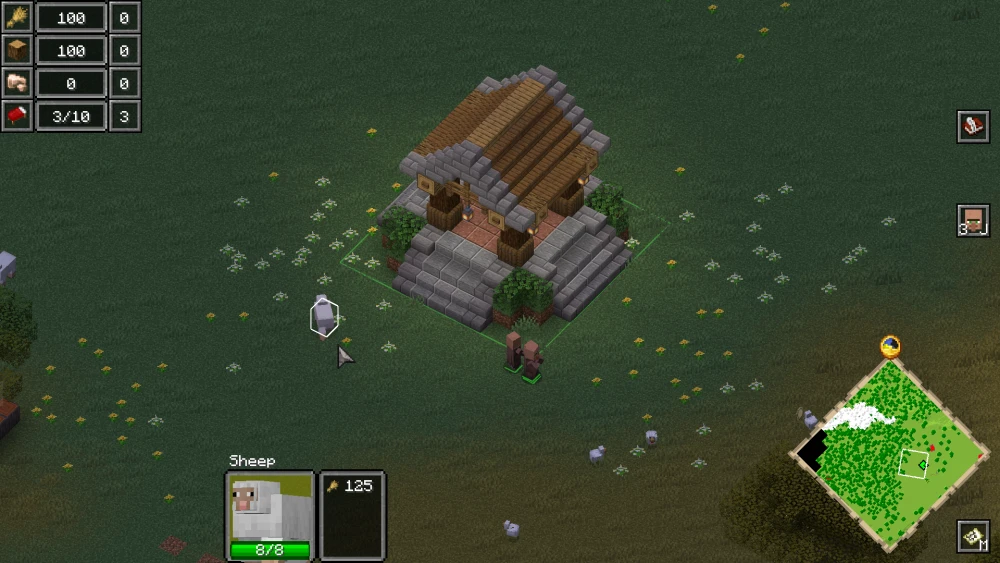
When the townhall is completed, you will notice that some other mobs, like sheep, has been spawned in. But most importantly, the 3/0 shown for the bed icon in the resource count indicator has now increased to 3/10. This means you have increased the total limit for villagers in your faction to ten, basically allowing you to summon seven more villagers to the already existing three.
How to Build other Structures?
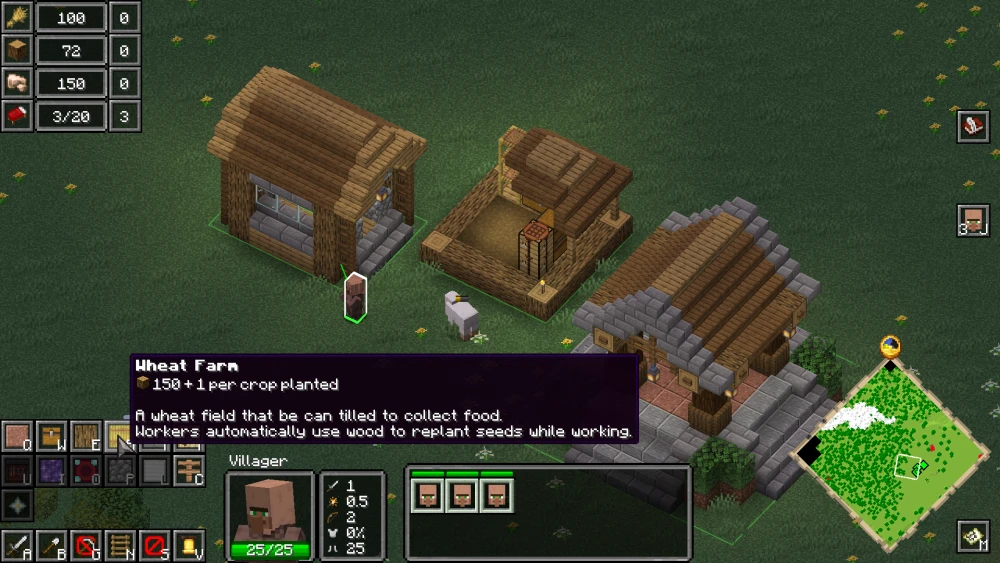
The construction of the townhall has unlocked some other builds. The button for these will no longer be greyed out. The stockpile, villager houses and wheat farm are some important structures to build at this stage of progression.
The stockpile is basically your faction inventory. Your inventory limit can be increased by building more and more stockpiles. Building a villager hut will increase the maximum number of villagers that can be summoned. And wheat farms are required to collect food.
Make sure you collect the required resources to begin construction, else the build will be left incomplete until you collect enough resources and re-assign villagers.
How to Summon More Villagers?
Three villagers are not enough to operate a faction. As you expand your faction, you will require more and more resources, which will require more and more villagers for work.
To summon additional villagers, you first have to select the townhall by left-clicking on it. This will open up the GUI elements of the townhall. On the bottom-left corner, a "Villager" button is given. Clicking on this button will activate a process that will summon new villagers. Make sure that the resource conditions given in the "Villager" button tooltip are met.
Villager Expertise
If a villager works on the same type of resource collecting job for a long time, they will gain expertise in that field. An experienced villager will work much more efficiently and produce more resources than regular villagers.
For example, a villager who has been chopping down trees and collecting wood for a long time will be upgraded to a veteran lumberjack. Veteran lumberjacks can undertake any profession that a regular villager can, but deploying them to collect wood would be the most efficient choice.

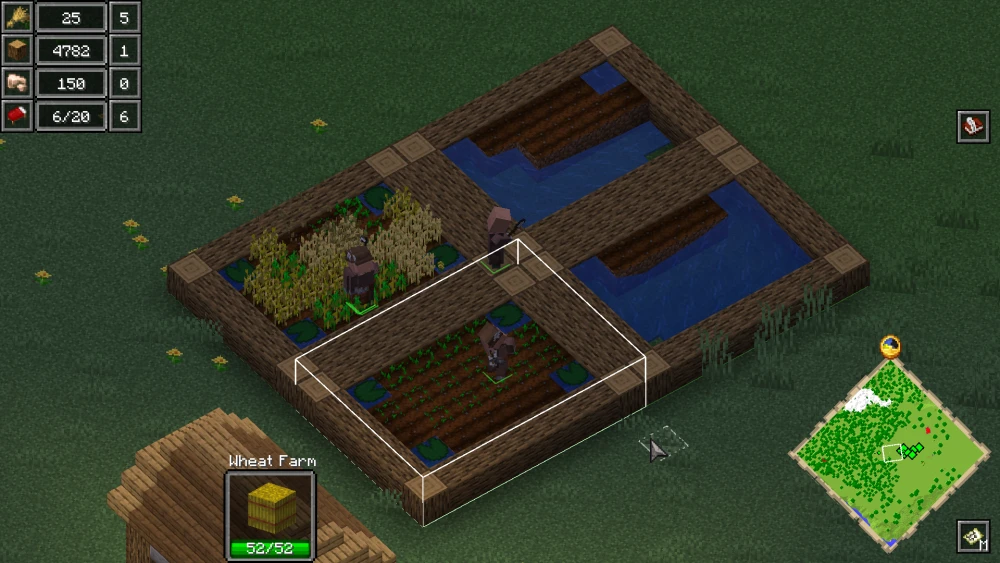
How to Collect Food?
Your main, and easily accessible, food source would be wheat farms. For this, you first have to build wheat farms. As explained previously, you can build wheat farms by selecting a villager and then clicking on the "Wheat Farm" button and placing the 3D hologram at an accessible location.

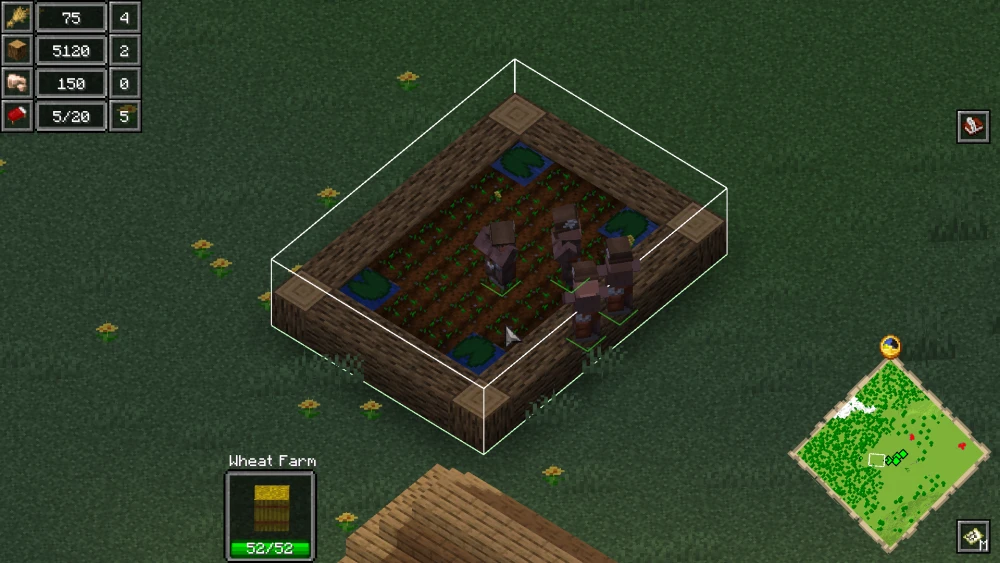
Once at least one wheat farm is placed, you can select a villager (or multiple villagers) and right-click on the wheat farm hitbox to assign them the job of farming. They will collect food (wheat) and deposit it in the stockpile. It is recommended to build multiple wheat farms and assign multiple villagers to increase food production rates.

How to Summon Pillagers?
Pillagers can be summoned to fight off monsters and keep your faction safe from enemies. It is them who will defend your village from external threats. To summon pillagers, you first have to build "Barracks".

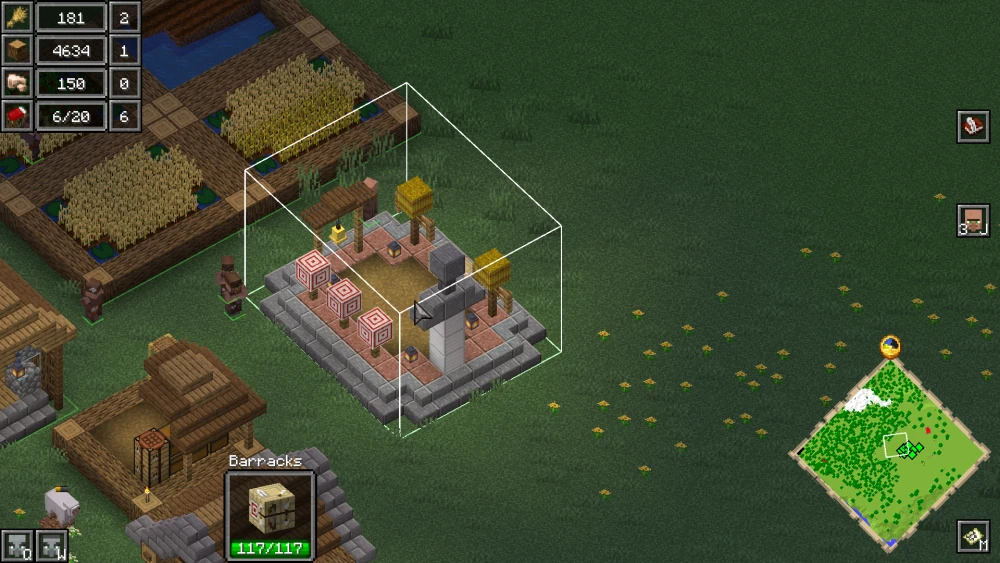
Once the barracks are constructed, you can left-click on them to open their interface, where you will find two buttons for Pillagers and Vindicators. You can summon the one of your choice by clicking on these buttons.

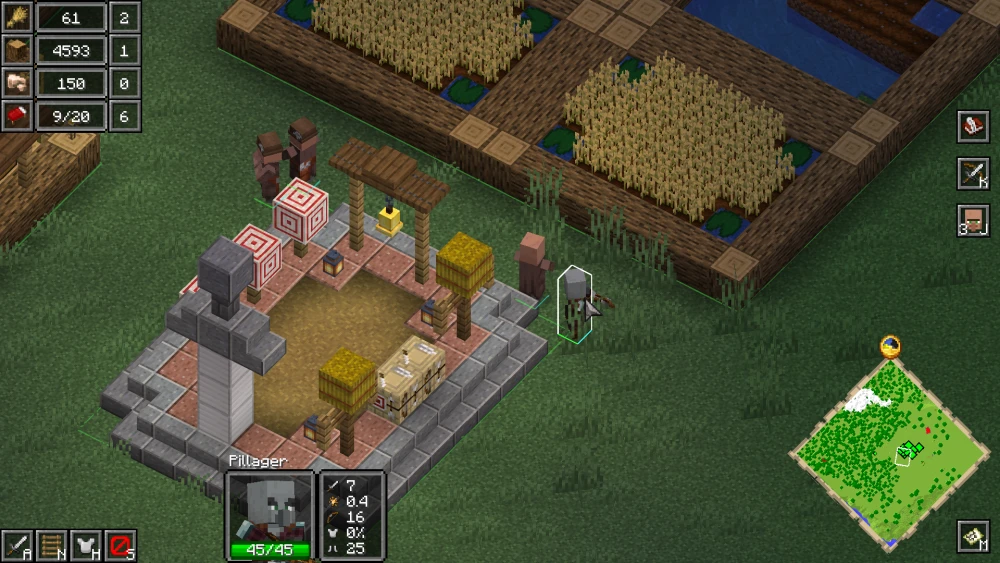
Additionally, you can select a pillager and right-click on a target mob to make the pillager attack the target mob.
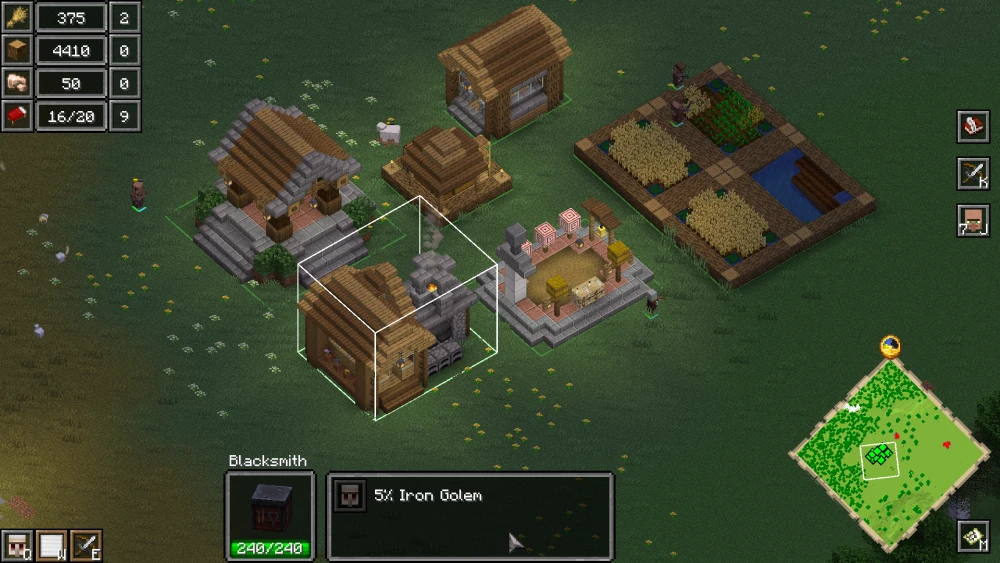
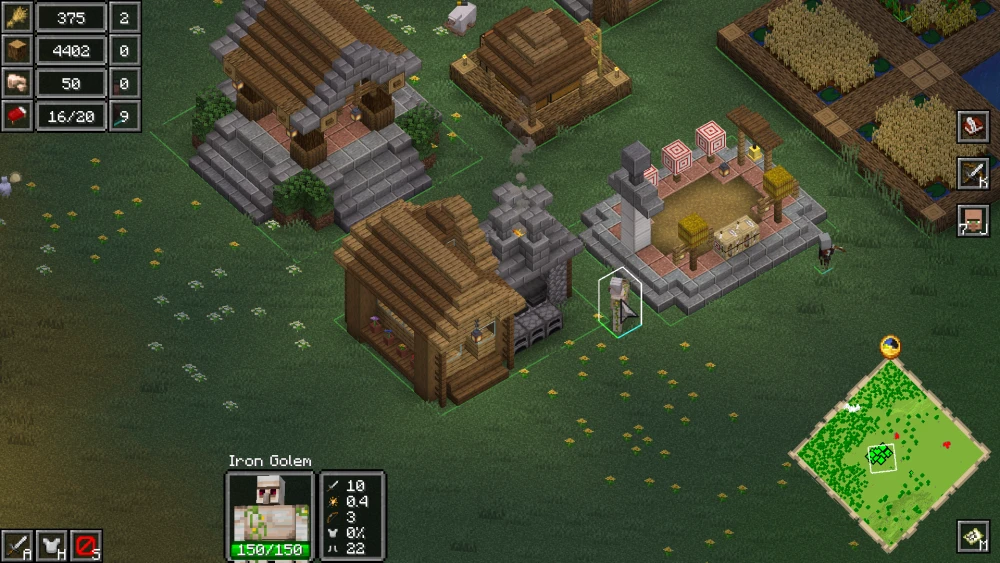
How to Summon Iron Golems?
The steps involved to summon iron golems are very similar to the summoning process of any mob in the game. Build the related structure and access the summon buttons.
To summon iron golems, you first have to build the Blacksmith.
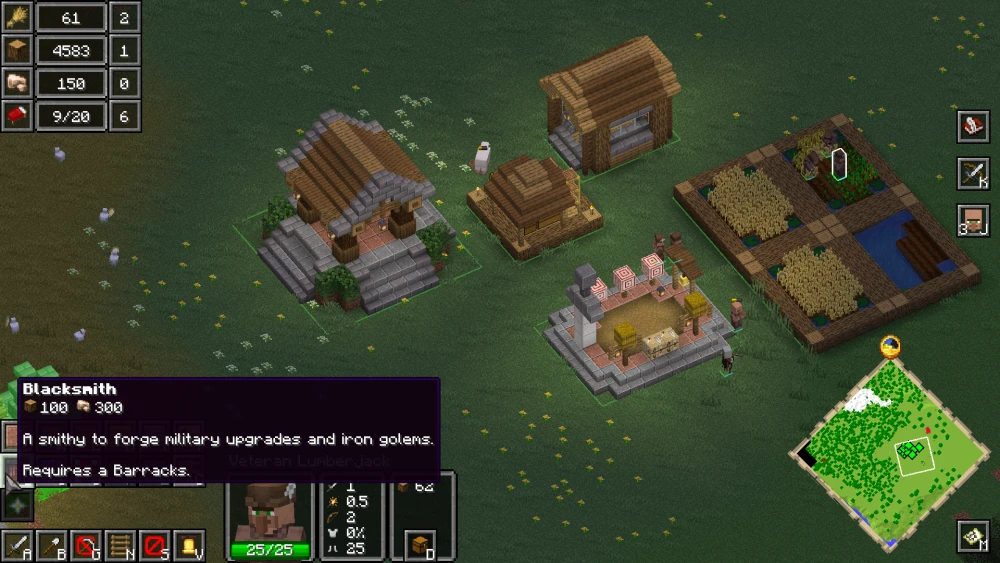
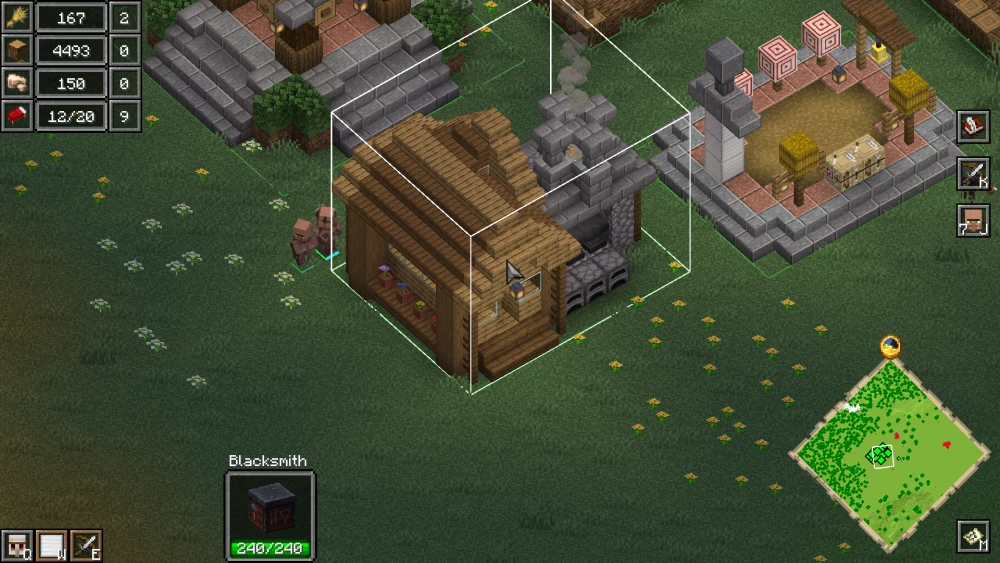
By selecting the blacksmith structure, you can access the button to summon iron golems.
More Structures And Expansion
You have now learned the steps required to build structures, unlock new structures, and get access to summoning different mobs. The mechanics required for further expansion to structures like towers and summoning of mobs like the ravager are very much similar and intuitive. Here are some important structures to build.
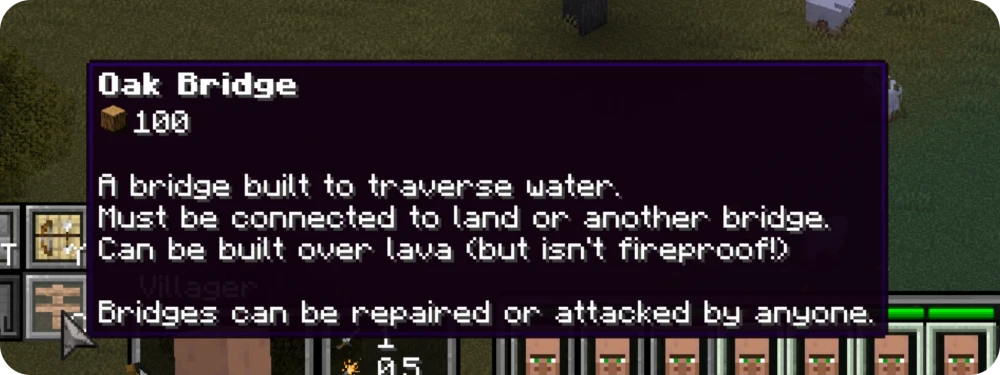
If a location you are interested in has water bodies or terrain gaps obstructing the way, you can strategically place bridges to make them more accessible.
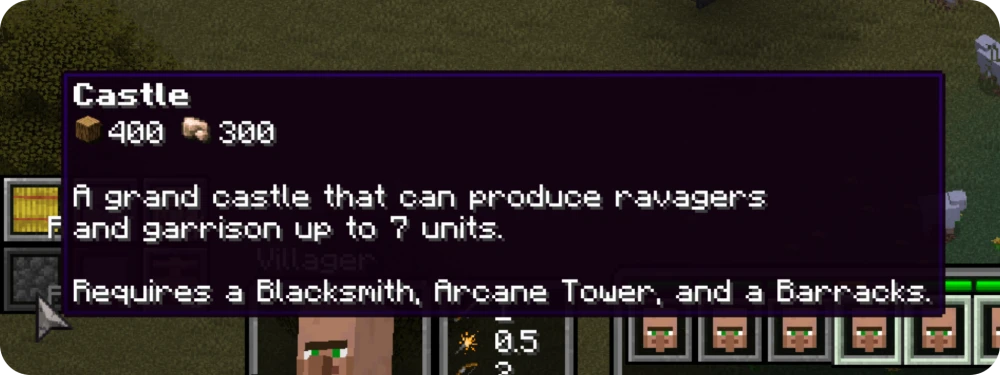
You can build a grand castle to improve the visual aesthetics, as well as get access to summoning strong mobs for defense, such as ravagers and garrisons.
Just like how beacons give you powerful effects in the vanilla game, a "stone beacon" can be placed to improve the efficient working speed and increase the output made by your villagers.

Troubleshooting Tips
Although this is a very complicated mod with complex features, it is surprising that the mod requires no other dependency at all. Although it is important to keep in mind that certain other popular mods can conflict with this mod and crash your game.
The most troubleshooting requests we get come from players who attempt to use this mod in combination with OptiFine.
Keep in mind that Reign of Nether RTS is incompatible with OptiFine. Both these mods will not work together.
Common Questions
Is Reign of Nether RTS multiplayer? Can you play it on a server?
Reign of Nether can be enjoyed both ways - single player and multiplayer. Simply choose a hosting service of your choice and launch a world with the mod installed. You can also utilize free hosting services like Aternos, if you prefer that.
Does Reign of Nether work with Terralith world generation?
Yes, Reign of Nether will work with Terralith and many other world generation mod of your choice. The problem is not with compatibility, but rather with gameplay. The terrain generation introduced by Reign of Nether is designed to make the terrain suitable for the RTS camera visuals.
How to Declare War in Reign of Nether RTS?
Wars occur when one faction attacks another. There is no "Declare War" button in Reign of Nether RTS. In certain game modes, players will be allowed to send troops to and attack other factions.
Does Reign of Nether work with Create automation mods?
Even if Reign of Nether is compatible with Create or any other automation mods, your workers will not be able to interact with the mechanisms. You will have to switch from RTS camera to regular Minecraft camera to craft, build or interact with any content introduced by Create or similar automation mods.
How to increase unit limit above 100 in Reign of Nether? How to increase the maximum population?
By default, the maximum population limit in a faction is set to 100. This limit can be increased using the /gamerule maxPopulation <value> command.
What is the difference between Monster Faction and Piglin Faction?
The main visual differences can be noticed in the structures of the factions. Gameplay wise, the workers of the Monster Faction can only work at night, as sunlight harms them. Structures in the Piglin Faction will turn surrounding blocks into Nether blocks.
Is there a Bedrock Edition mod like Reign of Nether RTS?
Unfortunately, the Reign of Nether RTS mod is available only for Minecraft Java Edition. No other properly functioning mods of the similar type can be found for Minecraft Bedrock Edition.
Tips to Enhance Game Performance
Although, Reign of Nether RTS mod is not very resource intensive, certain measures can be taken to make sure that your experience feels as smooth as possible, with little to no obstruction.
As mentioned above, Reign of Nether RTS is incompatible with OptiFine. Putting them together in the mods folder and trying to launch your game will result in a crash.
You can reduce the chunk render distance to improve game performance.
Conclusion
This article has taught you everything from basic controls to essential gameplay features. With all these information, you will soon be able to understand and play with the mod in a very intuitive manner.
